As the old saying goes, “the secret to getting ahead is to get started.” To help you start saving time with IP Fabric’s platform, I wanted to walk you through the initial setup process, step-by-step.
But before we get to the setup guide, we’re going to tackle the questions we hear the most from users when they’re setting up the IP Fabric platform for the first time:
IP Fabric’s platform is a plug-and-play OVA image that runs on VMware. Since it runs in a virtual environment as a standalone server, you don’t need any additional support services or licenses.
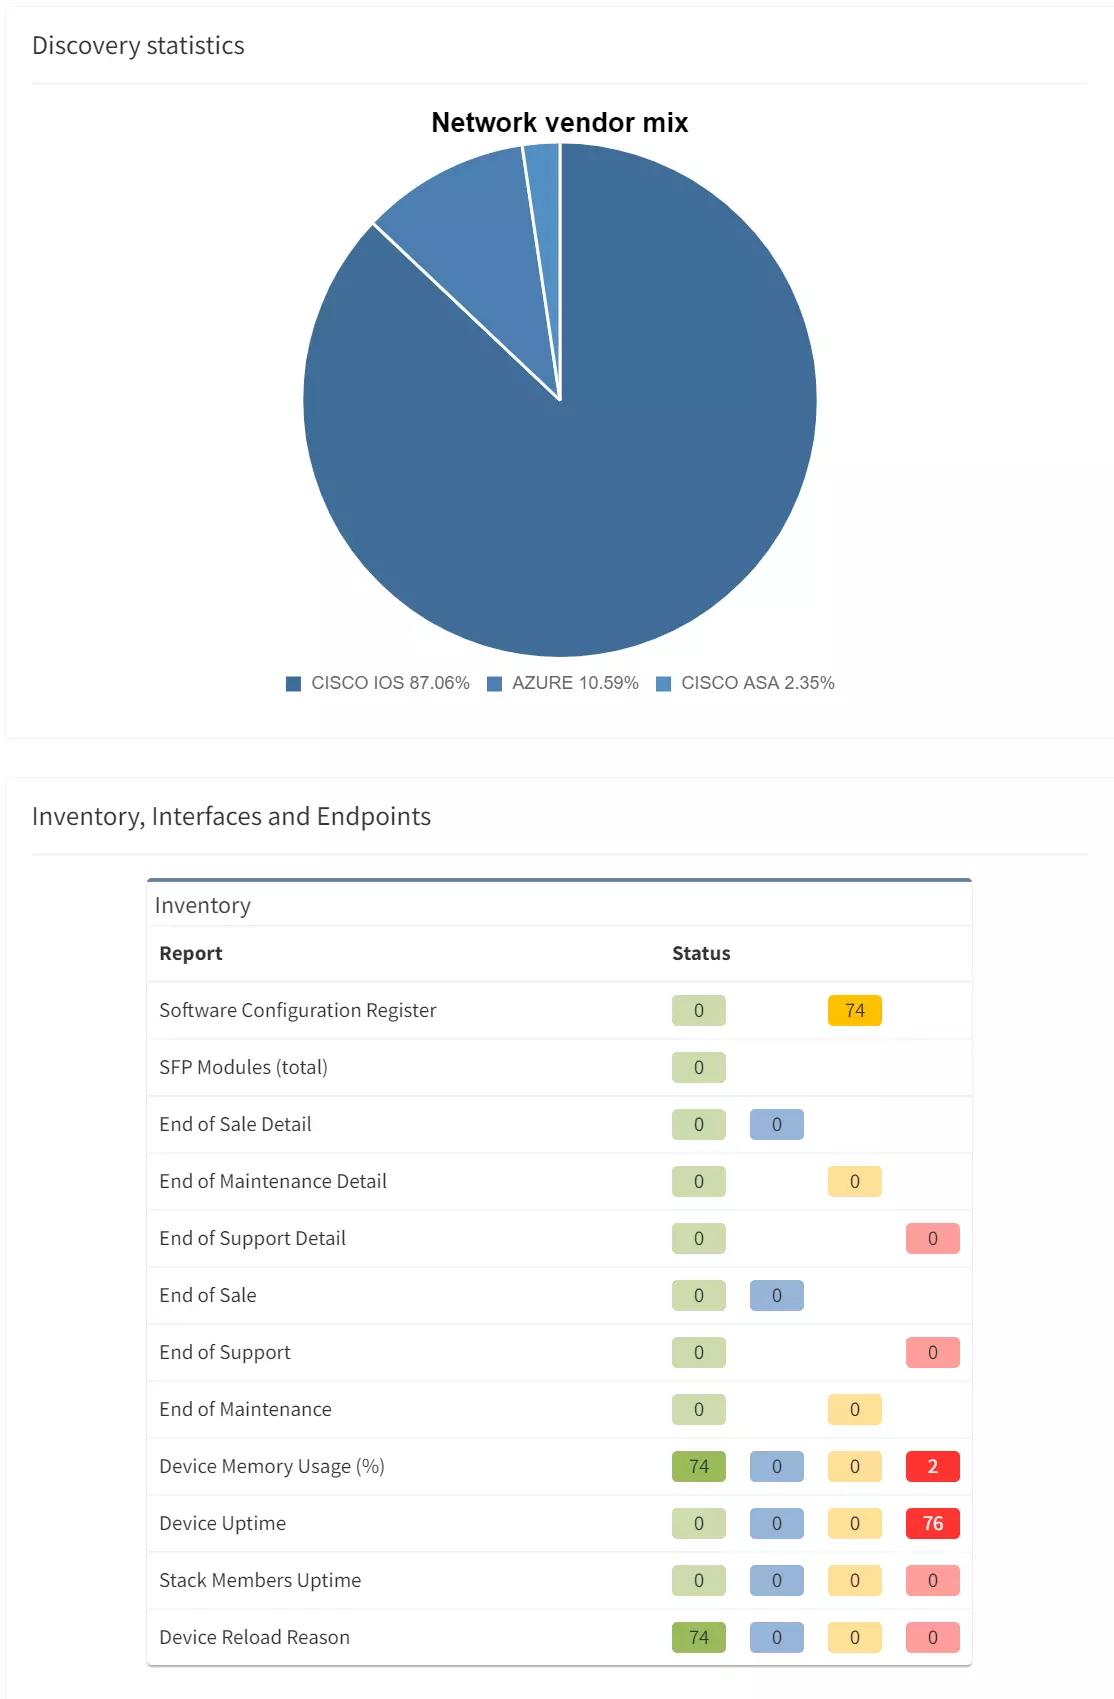
The discovery process is very similar to how administrator and network devices interact; the platform uses SSH or Telnet to connect to an active device and collects data using a predefined set of commands (which may vary between different hardware vendors and families).
No. Since there isn’t enough information included in SNMP, IP Fabric’s platform doesn’t use SNMP protocol to collect information. Now that we’ve covered all of that let’s move on to the initial setup process.
1. After you’ve successfully installed the platform in a VMware environment with the appropriate IP and default gateway properties, follow these steps:
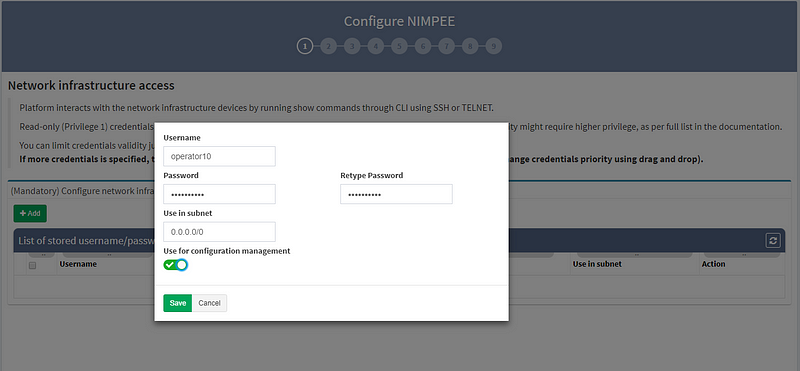
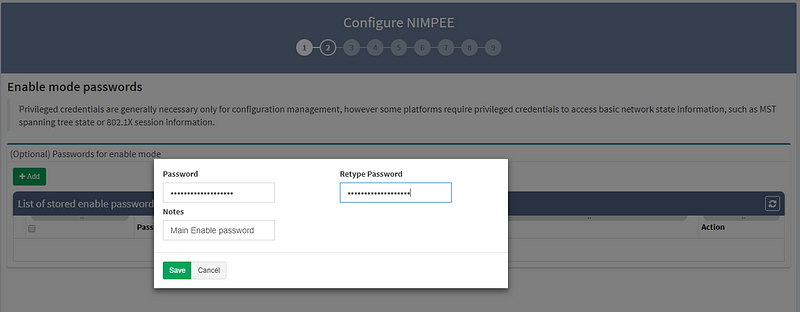
2. Next, enter the “enable password,” which allows you to move from User EXEC mode to Privileged EXEC mode on some devices.
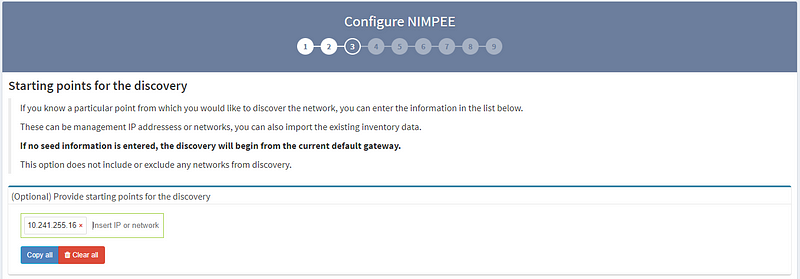
3. RECOMMENDED: Set the discovery starting point by entering the seed IP address (or addresses).
While this isn’t mandatory, we strongly recommend that you give the system at least one seed IP address to work with. Otherwise, the platform will try to discover IP networks by using traceroute over the gateway, which doesn’t necessarily produce the best results. In this example, I’ve used the management IP address of one of the routers in my virtual lab.
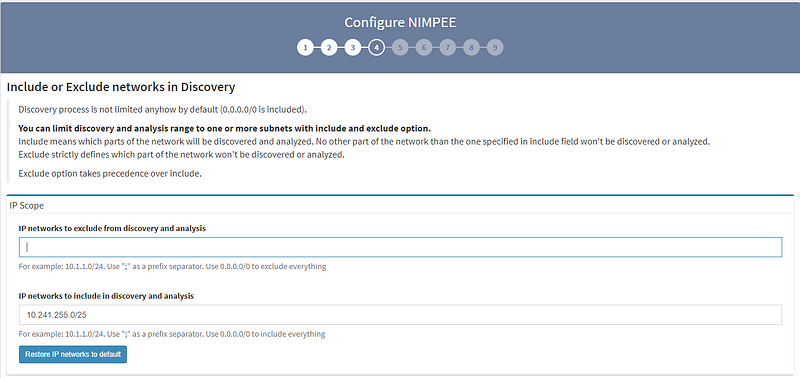
4. OPTIONAL: If you’d like, you can include/exclude networks from the discovery process. If you don’t create any predefined IP network boundaries in your discovery process, you can include any IP addresses (0.0.0.0/0).
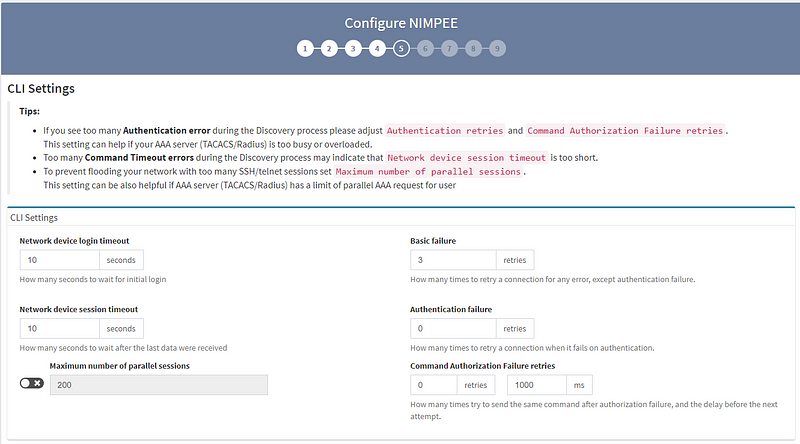
5. The Command Line Interface (CLI) settings section is mainly for fine-tuning SSH or Telnet interactions between the platform and devices. Unless you encounter a significant amount of authentication retries or other errors during the discovery process, I recommend you stick with the default settings we’ve provided. For security reasons, we also give you the option to limit the maximum number of parallel sessions.
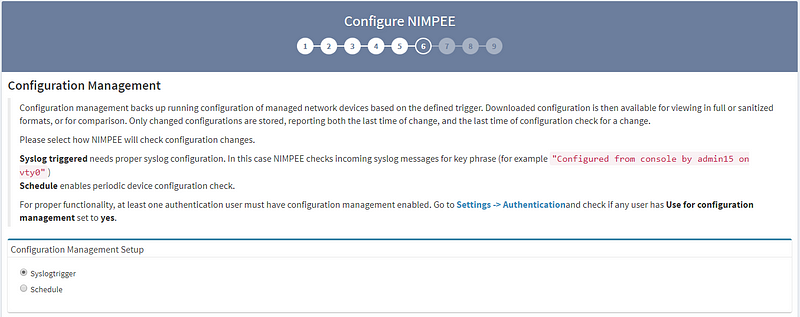
6. The Configuration Management settings section allows you to tell the system when you’d like to collect data from network devices, either through scheduling or when triggered by an SYSLOG event.
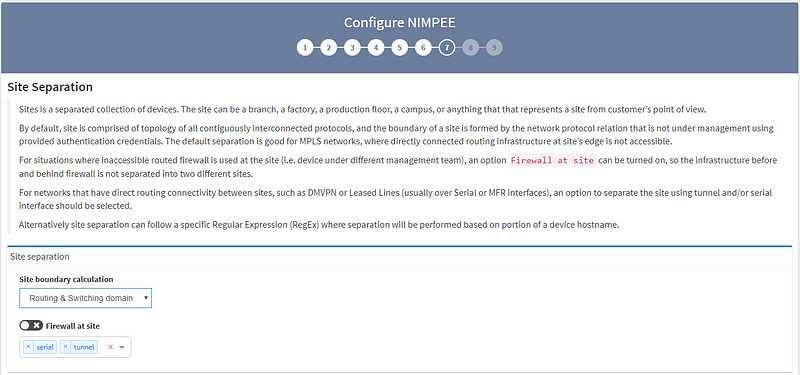
7. The Site Separation page has two boundary calculation options: the first is based on “Routing & Switching domain,” and the second is based on “Regular Expression.” (Note: the “Regular Expression” option is customizable.) I strongly recommend looking into both options to see which one best suits your needs. For this example, I’m using the “Routing & Switching domain” separation option.
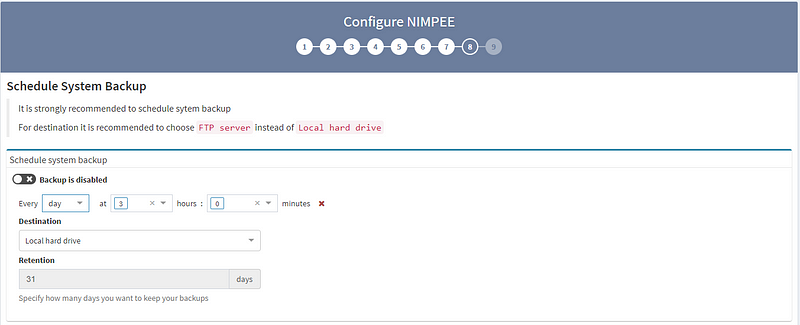
8. STRONGLY RECOMMENDED: While this step isn’t mandatory, we strongly recommend configuring automated environment backups.
Congrats! Now that you’ve completed these steps, you’ve finished setting up your IP Fabric platform. Now, get out there and get discovering!
As the old saying goes, “the secret to getting ahead is to get started.” To help you start saving time with IP Fabric’s platform, I wanted to walk you through the initial setup process, step-by-step.
If you’re interested in learning more about how IP Fabric’s platform can help you with analytics or intended network behavior reporting, contact us through our website, request a demo, follow this blog or sign up for our webinars.
As the old saying goes, “the secret to getting ahead is to get started.” To help you start saving time with IP Fabric’s platform, I wanted to walk you through the initial setup process, step-by-step.
But before we get to the setup guide, we’re going to tackle the questions we hear the most from users when they’re setting up the IP Fabric platform for the first time:
IP Fabric’s platform is a plug-and-play OVA image that runs on VMware. Since it runs in a virtual environment as a standalone server, you don’t need any additional support services or licenses.
The discovery process is very similar to how administrator and network devices interact; the platform uses SSH or Telnet to connect to an active device and collects data using a predefined set of commands (which may vary between different hardware vendors and families).
No. Since there isn’t enough information included in SNMP, IP Fabric’s platform doesn’t use SNMP protocol to collect information. Now that we’ve covered all of that let’s move on to the initial setup process.
1. After you’ve successfully installed the platform in a VMware environment with the appropriate IP and default gateway properties, follow these steps:
2. Next, enter the “enable password,” which allows you to move from User EXEC mode to Privileged EXEC mode on some devices.
3. RECOMMENDED: Set the discovery starting point by entering the seed IP address (or addresses).
While this isn’t mandatory, we strongly recommend that you give the system at least one seed IP address to work with. Otherwise, the platform will try to discover IP networks by using traceroute over the gateway, which doesn’t necessarily produce the best results. In this example, I’ve used the management IP address of one of the routers in my virtual lab.
4. OPTIONAL: If you’d like, you can include/exclude networks from the discovery process. If you don’t create any predefined IP network boundaries in your discovery process, you can include any IP addresses (0.0.0.0/0).
5. The Command Line Interface (CLI) settings section is mainly for fine-tuning SSH or Telnet interactions between the platform and devices. Unless you encounter a significant amount of authentication retries or other errors during the discovery process, I recommend you stick with the default settings we’ve provided. For security reasons, we also give you the option to limit the maximum number of parallel sessions.
6. The Configuration Management settings section allows you to tell the system when you’d like to collect data from network devices, either through scheduling or when triggered by an SYSLOG event.
7. The Site Separation page has two boundary calculation options: the first is based on “Routing & Switching domain,” and the second is based on “Regular Expression.” (Note: the “Regular Expression” option is customizable.) I strongly recommend looking into both options to see which one best suits your needs. For this example, I’m using the “Routing & Switching domain” separation option.
8. STRONGLY RECOMMENDED: While this step isn’t mandatory, we strongly recommend configuring automated environment backups.
Congrats! Now that you’ve completed these steps, you’ve finished setting up your IP Fabric platform. Now, get out there and get discovering!
As the old saying goes, “the secret to getting ahead is to get started.” To help you start saving time with IP Fabric’s platform, I wanted to walk you through the initial setup process, step-by-step.
If you’re interested in learning more about how IP Fabric’s platform can help you with analytics or intended network behavior reporting, contact us through our website, request a demo, follow this blog or sign up for our webinars.